How to Design T-Shirts: A Beginner’s Guide
Designing your own t-shirt can be much easier than one might think. No design skills or fancy equipment are necessary, just some ideas that have to be transferred to the material.
This guide on how to design t-shirts describes the process in detail, from creating the very first sketches to selecting the colors, finding the right shirt, and printing it.
The guide is intended for those who have absolutely no idea where to start from, so that nothing is left out of account and no step feels out of reach.
What Makes a Good T-Shirt Design
Most of the time, the simplest t-shirts work out best. With just an image or a few words, the viewer can still understand what is written when he/she takes a few steps back, but with too much going on, this is impossible because the whole design becomes blurry.
Contrast is also another aspect of design since printing dark ink on a dark shirt makes it difficult to see, while light ink on a light shirt becomes invisible. The font used and its positioning are other factors that determine the feeling a design conveys.
Fonts that are thin tend to get distorted in printing when using the screen printing technique, while thick fonts maintain their quality. A design in the center of the chest looks average, while one close to the shoulders looks mild. The one at the back appears strong.
Last but not least, consideration of the person the shirt will be worn by must also be considered. A good design should not only look professional but should also be appropriate to the wearer and the purpose for which it has been made.
How to Design T-Shirts Step by Step
1. Start With a Clear Idea
Before you start using any design software, you need to know what you want to create and for what purpose. A jersey for your soccer team is completely different from one for your small web business.
There are two aspects that need to be figured out before everything else. The first is about whom the shirt is meant for – whether it is a gift, a team shirt, or one meant for selling. The second is about what the shirt must say without even saying anything.
2. Sketch Rough Drafts on Paper
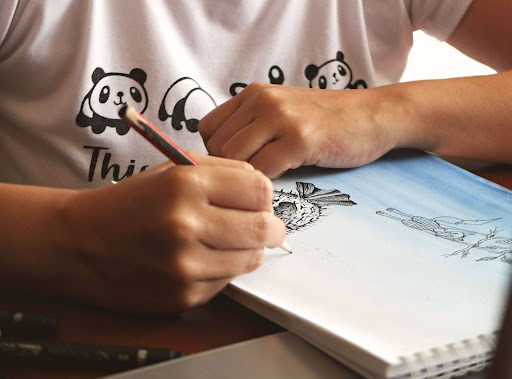
Pick up a pen and start drawing your first rough sketches. This will allow you to explore your thoughts quickly, without concern for computer programs, layers, or eraser keys. At this point, quality doesn’t matter; it’s all about the number of drawings.
It is perfectly normal to go through five sketches of an idea until you have something that you feel works. The sketch that you can recognize even by squinting from across the room is likely the one you want.
3. Move Your Design to a Digital Tool
After creating a design that you like, draw it again using the computer. Free applications are a fine place to start—Canva works well for text, Krita or GIMP for illustrations, and Illustrator if you ever plan to sell shirts in the future.
Whichever tool you end up choosing, make sure to save or export your final image as either a high-resolution PNG file or a scalable vector file — this way, the design will stay sharp, clean, and detailed when it gets printed onto fabric.
4. Pick Your Colors Carefully
Colors behave less predictably on cotton than on a screen. A vivid neon on your monitor can look noticeably duller once printed, and light gray tends to disappear straight into a white shirt.
Stick to a limited number of colors, as two or three will work better than six. Don’t forget to consider the color of the shirt as well: a dark color protects from stains but attracts lint, whereas white does the opposite.
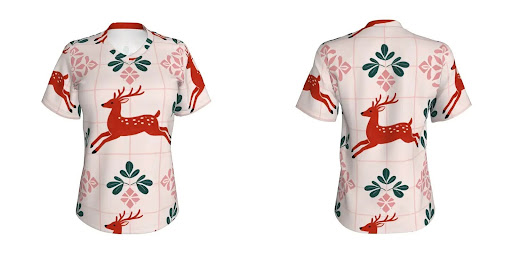
Women’s V-Neck Short-Sleeve T-Shirt
5. Choose the Right Shirt
Just like the design, the material is important. A few things worth paying attention to:
- Material — 100% cotton is comfortable but shrinks; blended fabric holds its shape well
- Weight — heavy fabric looks durable but runs warm; light fabric flows better
- Fit — boxy, fitted, or loose- each sends a different message.
Ask for an unprinted sample before ordering the bulk of your material. What looks good online may not be comfortable in person.
6. Choose a Printing Method
There is no single solution for all requirements. Screen printing suits well where there are many items with fewer colors to be printed on. DTG printing involves full-color printing but at an increased cost per piece of garment.
Heat transfer is a low-cost and quick option, though it doesn’t hold up quite as well over time as some of the other printing techniques out there. For a one-off design or a small custom project, DTG or heat transfer is usually the easiest route to go.
7. Send It to a Printer
Once your file is fully ready to print, go ahead and upload it to any print service provider of your choice. Websites like PrintKK will handle the entire process for you from start to finish, taking care of both the printing and the mailing directly to your door.
Before you finalize the order, be sure to carefully review the design preview they show you — double-check that the artwork is positioned in the right spot on the shirt and that the colors look accurate to what you intended. Mistakes at this stage can get expensive fast.
Conclusion
Figuring out how to design T-shirts is really just a mix of playing around and paying attention. Sketch the idea that’s been rattling in your head. Pick two colors that feel right together. Print one, wear it, notice what you’d change.
Your first shirt won’t be your best — the neon prints are duller than expected, or the design sits too low. That’s how you learn. Tweak the file, try a new placement, and soon you’ll open a package and actually want to wear the shirt out.
Read more: How Custom Printed T Shirts Support Community Events and Parties
Read more: Top 5 DTF Transfer Services Every Small Business Owner Should Know About in 2025
Read more: How Screen Printing Has Helped in Evolving the New Age Fashion Industry?